
Note: This is not about tuning, this is the trials of dissassembly & reassembly of badly frozen carbs.
A long time ago I acquired a pair of HIF carburetors for $10. They were beyond just nasty, nothing would move in or on them. Totally frozen!!! I bought a rebuild kit, but I was mystified by the instructions.
They sat on the shelf for a long time, but finally I had an immediate need for them. The SU HS4's on my 71 had a throttle shaft leak, and I needed a replacement until I could re-bush the shafts; so I decided to clean these HIF4's up.
The instructions were still greek to me, but armed with a six pack of beer I decided to attack the beasts. As you can see in the before and after picture components were hard to distinguish. It took two beers worth of looking at them before I would even put a wrench or screwdriver to work. Finally with 3 cans of courage I started disassembly on the first one. As I said previously none of the parts moved. The piston was stuck in the chamber, the choke wouldn't budge, the throttle was frozen.
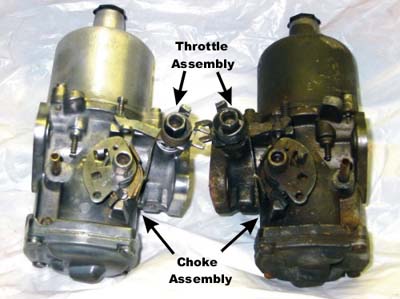
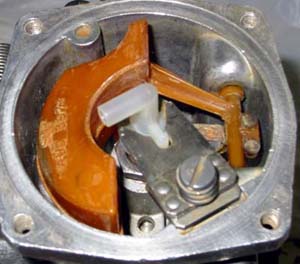
SU HIF4 throttle and choke assemblies, before and after
I removed the air chamber, but the piston was frozen in main body of the carb. While it was soaking, I tried to remove the choke assembly, no luck. the outer parts came off easy enough but the part inside the carb body wouldn't budge.
I put some PB Blaster on this and decided to attack the fuel bowl. After I removed the screws I started pounding on the case, tried prying, pounded some more and finally the cover came off. I don't think I have ever seen anything as ugly as the inside of that fuel bowl.
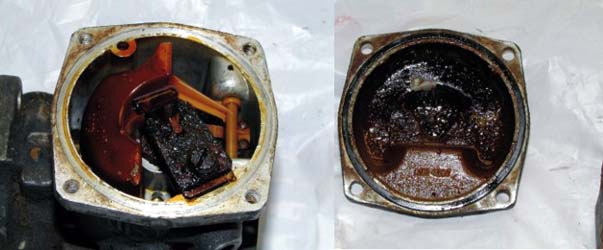
SU HIF4 fuel bowl, full of dried gasoline residue. Yuck!
This ugly stuff was not rust, it was old fuel. This is the gunk that stops up fuel lines, hoses, and the carbs themselves. It was crystallized and built up in a measurable layer on the lower parts of the fuel bowl. You will have to remove all of it if you want a working carburetor again.
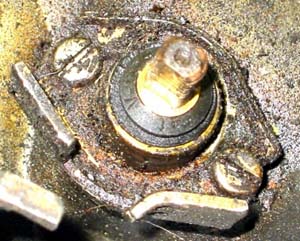
SU HIF4 fuel bowl, dried gas "varnish" on fuel pickup |
SU HIF4 fuel bowl pickup and float after cleaning |
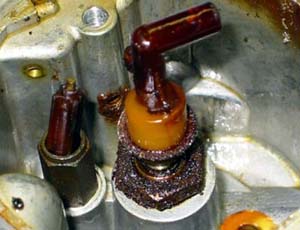
After removing the spindle screw that holds the float and the screw holding the "Temperature Compensator" and the adjustment screw for the same I was able to work out the part off the jet's fuel pickup. Now with the float and compensator removed I could see the main part of the jet and the fuel feed needle and seat.
The needle and the jet were both originally white plastic. Now covered with a thick coat of red varnish (Dried gasoline residue) and the jet bearing bolt was covered by caramelized fuel (Not rust). Just like some of the other parts the jet would not come out. Since I had a replacement I attacked with a vigor. No luck, The end pulled off, but the shaft of the jet was stuck!!!
While letting the various parts soak with carb cleaner, PB Blaster, and even acetone at one time or another, It was time to wash up my hands and have another beer, maybe two. In a moment of inspiration, I sent the wife for another six pack. No... make that a 12 pack.
Refreshed, I again marched into battle; no mechanical foe was going to beat me even if I was fighting on his turf. By now some of the parts were starting to loosen. With one of those ridiculously oversized screwdrivers, I pried out the piston. With a pair of channel locks I twisted out the jet shaft. The jet bearing still wouldn't move. Dammit the "Starter Valve" (Choke) won't budge either.
More soaking and finally the choke valve would twist and finally came free. It looked like a one piece unit, but it had to be able to turn somehow. Washed my hands again, got another beer and pulled out the Haynes manual, no help there, got out the Moss catalog and found the picture - it is indeed 2 main pieces!
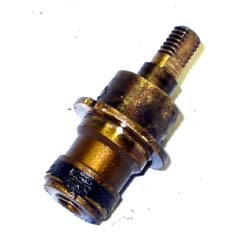
HIF4 choke valve, frozen together by old gas |
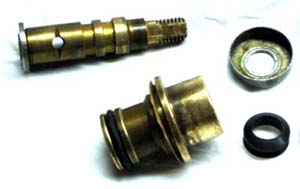
SU HIF4 choke valve finally taken apart |
I left this to soak some more while I removed the jet bearing. Hey the throttle is still there, I'll just remove this. Surprisingly it actually came out without a fight. And to my astonishment the jet bearing fell out with just a tap at the top.
I now have the whole thing disassembled!!! Time to clean up the main carburetor body. Black and dark brown dried crud everywhere inside. Old grease and gunk all over the outside. For the next two hours I cleaned, wire brushed and cleaned some more. Half a gallon of mineral spirits, a can of carb cleaner, a lot of brake cleaner, and a couple of beers later it was starting to look presentable; although I wasn't seeing only one of anything. It would probably be better to finish this tomorrow. Besides I still have the other whole carb and linkage to do.
Coming Attractions...
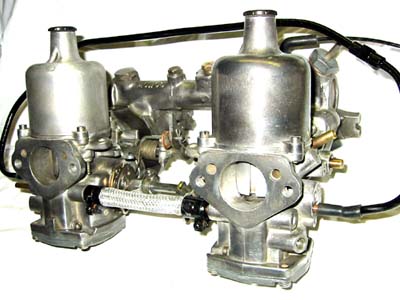
SU HIF4 carburators restored to better than new
[Ed. Note- here's how the whole thing goes together...]
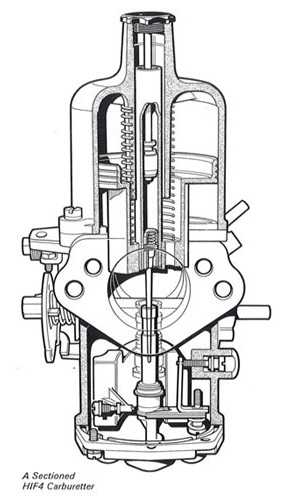
SU HIF4 Cross Section Parts Diagram

")


Heres to 'ya... The carbs look fantastic now, do they work?
Want to leave a comment or ask the owner a question?
Sign in or register a new account — it's free