
By Kim de Bourbon
Originally published by The Shadetree MG Project
If you've got a Mark I MGB (1963-67), congratulations! You have a car with the highly prized original style metal dashboard, painted with the matte finish black "crackle paint" that became an MGB trademark. In late 1968, the Mark II models sold in America were redesigned with the highly disdained plastic "Abingdon pillow" dash, padded for the safety-crazed U.S. market. The "pillow" dash eventually gave way to a more attractive modern plastic-covered dashboard, but B's never regained the elegantly simple style of the early metal dash.
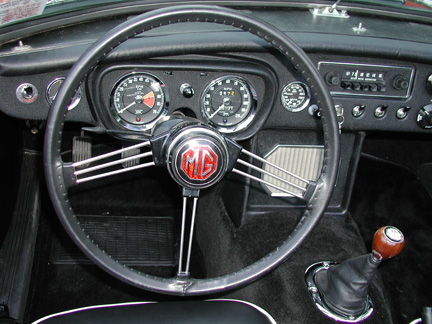
MGB Mk I Steel Dashboard with Crackle Paint Finish
After many years of service, however, inevitably it will be time to repaint your dashboard. (Especially if the previous owner negligently allowed a big gaggle of keys to scrape against the dash under the ignition switch.) It would seem to be a simple job once you get the dash out of the car, but more than one Mark I B owner has been frustrated trying to get a good wrinkle finish on his metal dash.
Here are some simple guidelines to good "wrinkle painting." I had excellent results painting the dash on my 1966 B with the following techniques. (These notes may also prove useful because the directions on the spray can label are printed in INSANELY tiny and condensed type. Terribly difficult to read for any of us aging presbyopes.)
You'll need:
- (2) cans of black wrinkle paint (Plasti-Kote #217)
- (1) can of automotive spray primer, gray
- One metal dashboard and glove box door, stripped and cleaned. (Also your radio blanking plate or metal radio face plate, if you have one of the old AM radios.)
- Level work area in a relatively clean area (a board over two sawhorses will do)
- (2) cheap clamp-style work lamps fitted with heat-lamp bulbs (GE Warm Up Infrared Heatlamp 250 W)
- Hair dryer or hot air gun. (Use an old hair dryer, or be prepared to mess one up. It will suck up residual air-borne paint particles.)
- Blocks of wood to prop up the dashboard and glove box door.
About the Paint
I used Plasti-Kote #217 Black Wrinkle Paint. The Roadster Factory sells it, and it is also available at any local auto parts store that sells the Plasti-Kote paints. Buy two cans. You may be able to paint the dash with one can, but if you've never used the stuff before, you'll get better results -- and be less frustrated -- if you take the time to practice paint a piece of scrap metal or cardboard first. And it's best not to run out in the middle of the job.
You'll first need to remove the chrome trim from the glove box door and radio blanking plate, which are press-fit. (Prongs on the chrome trim snap into holes in the pieces.) Use a small flathead screwdriver to pry it up, gently so you don't wreck the chrome or break the prongs.
Also, don't forget to remove the two steel brads that mark the 'off' position of your heater gauges. (They should remain silver colored) From the back of the dash, just carefully pry up the two bendable legs that hold each brad in place.
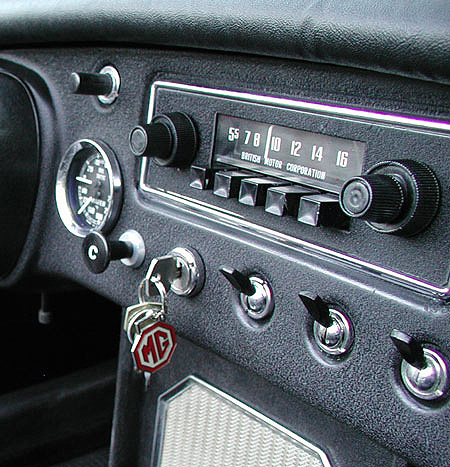
Close up of early MGB steel dashboard, BMC radio, toggle switches
Preparing the Dash
Strip all the old paint off your dash and glove box door. I used Mar-Hyde Tal-Strip Paint Remover from the auto parts store, then washed and sanded carefully to get all remnants of the old paint and stripper off. (Note: Tape up the holes in the glove box door where the chrome strip goes. Otherwise, when you rinse you'll get water inside the door)
Primer the pieces with any good automotive spray gray primer. (I used gray Plasti-Kote Sandable Primer, T-235.) Allow to dry thoroughly.
You may want to repaint the inside of the glove box door and the back of the dash. The inside of the glove box door looks good in a satin black paint. (It's not too flat, not too shiny.) I used a high-gloss white on the back of the dash, recommended to reflect light the next time you find yourself upside down under the dash with a flashlight. You should paint the inside of the door and the back of the dash BEFORE you do the wrinkle paint, of course.
Set up your "paint booth." Heat is the key to a great wrinkle paint job. Some people recommend painting the dash outside on a nice hot day... but I prefer a more controlled environment indoors in the workshop. I set up on a heavy piece of cardboard on sawhorses, under two clamp-style work lights fitted with 250w infrared heat lamp bulbs. (Available at major home stores in the light bulb section.)
Set the dash under the heat lamps, at the usual work light distance. DO NOT get the dash HOT. Just a healthy room temperature warm. You don't need to break a sweat in the room.
The face of the dash is what you want to concentrate on, so prop the dash up on wooden blocks so the face of the dash is horizontal and level. Same with the glove box door. (If you just set the pieces down without propping them, the faces won't be level, and you run the risk of having the paint run or sag, plus it will be harder to spray the paint evenly.) As a matter of fact, don't worry about getting the underlip of the dash or the edges of the glove box door perfectly wrinkly. You're not going to see them anyway.
As previously noted, it will serve you well to practice paint something, like a piece of sheet metal or smooth cardboard, so you get a feel for the paint and see how it behaves.
Because other than the heat, the trick is getting just the right amount of paint down with each layer. The directions call for three "uniform, heavy coats." That means heavier than you're probably used to spraying, but not so heavy that the paint runs and sags. This is where the practice comes in! And, of course, follow the directions and shake the can for a full minute after you hear the ball rattling to mix it up right. And remember to shake intermittently as you continue to spray and before each coat.
Here goes. Holding the can 10 to 12 inches away from the piece, spray a nice good first coat, applied in smooth, even, overlapping strokes. Wait 10 minutes. (Watch the clock.) Spray a second nice, good coat. Wait 10 minutes. (Watch the clock!) Spray a third and final nice, good coat. Let it set up a bit, then grab the hair dryer. Hold the dryer over one section, moving it back and forth. Soon you'll see the wrinkles forming. That's the fun part!
If you practice your technique first, and faithfully follow these directions, you'll have a dash to be proud of.
And remember, if you goof it up the first time and aren't happy with the results, chalk it up to experience and have another go at it. You won't be the first to strip the dash down and do it again. (I did!) Remember, you'll be spending a lot of time staring at this vital piece of your B's interior, and it's worth your time to get it right.
Tips and Tricks
Protect your dash beneath the ignition switch. Don't hang a big honkin' set of other keys on your MG's key ring. They'll inevitably bang against the dash and scratch it. For any other keys which you must have on the same ring, use those rubber rings sold as key identifiers in most hardware stores. They go around the key head, and they'll protect your dash paint job quite nicely.
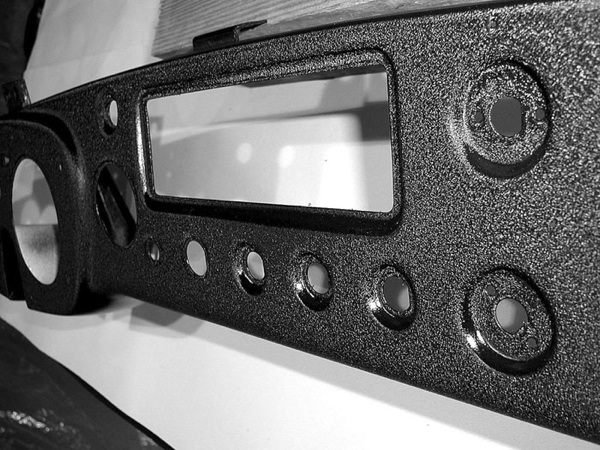
Repainted metal dash wrinkle finish, radio and switches area
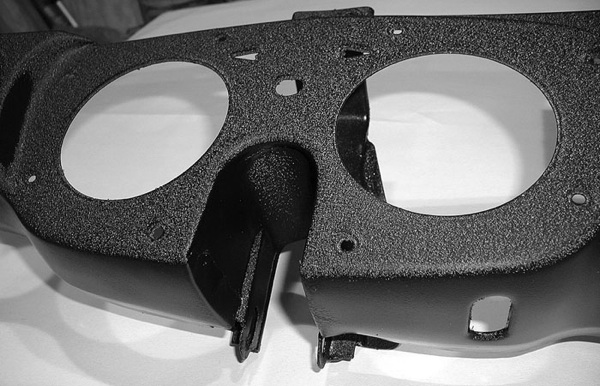
Repainted metal dash wrinkle finish, gauge area
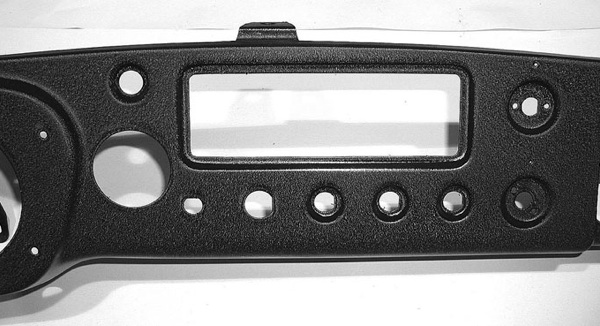
Repainted metal dash wrinkle finish, front view

")


Thanks Michael, great info - I checked the Sherwin-Williams website and they said their brand "Krylon" has Wrinkle Paint under part number CD3370. I suspect the SW paint under the Krylon brand name will be much easier to locate.
(Bright lights.) In real life, the finished dash using Plasti-Kote paint is fine grain, not shiny, dark black.
I'll be restoring a '73 MGB's interior in a couple of months, and I'm going for a biscuit color. I've seen how good biscuit looks on everything, including the dash and console. If I use this method, how would I go about getting the color I need? These come aerosols, so matching is a little harder. Do you go over with a wrinkle primer and then the biscuit color?
Thanks
Want to leave a comment or ask the owner a question?
Sign in or register a new account — it's free